UV lightbox cheap equivalents?
- Thread starter alband
- Start date
BeanieBots
Moderator
They're used in fish tanks and ponds.
Try some equatic stores. Probably not cheap though, due to low demand.
Try some equatic stores. Probably not cheap though, due to low demand.
Hi all
I just wondered if compact fluorescent uv bulbs would do the job. It might be necessary to use several of them but it will eliminate chokes, starters and fiddly fittings.
http://www.maplin.co.uk/Module.aspx?moduleno=33124
Edmund
I just wondered if compact fluorescent uv bulbs would do the job. It might be necessary to use several of them but it will eliminate chokes, starters and fiddly fittings.
http://www.maplin.co.uk/Module.aspx?moduleno=33124
Edmund
westaust55
Moderator
Try looking for something along these lines.
http://www.adelab.com.au/index_files/uvlamp.htm
In the past I used UV lamps around 250nm wavelength mainly for the old EPROMS. They worked well with the PCB etching as well.
You might want to check if there is any optimal wavelength for the resist chemcials you are using.
I had a 15 watt tube and had the EPROMs and PCB's roughly 40mm from the tube. Cannot now recall the exposure time for the PCB's.
EDIT:
http://www.diytrade.com/china/4/products/1262632/UV_lamps_and_INFRARED_LAMP.html
Germicidal Ultraviolet UVC PL Twin Tube Biax 5 Watt to 96 Watt, ozone and non-ozone producting lamps, 185 and 254 nm.
Last edited:
Dunno.
Buy it and try it") .
.
Or get yourself a UV fly killer.
You can get replacement tubes for very little cost.
http://www.tlc-direct.co.uk/Products/FKT10UV.html?utm_source=overture&OVRAW=actinic UV tubes&OVKEY=actinic fluorescent tube&OVMTC=advanced&OVADID=19813449031&OVKWID=152234564531
Obv you wll need a thingy to drive them.
UV exp boxes use actinic UV tubes - but I'm sure you all knew that already
(I didn't, I've just found out)
Or just buy a zillion UV LEDs and spend a few hours polishing the tops off.
Buy it and try it
.Or get yourself a UV fly killer.
You can get replacement tubes for very little cost.
http://www.tlc-direct.co.uk/Products/FKT10UV.html?utm_source=overture&OVRAW=actinic UV tubes&OVKEY=actinic fluorescent tube&OVMTC=advanced&OVADID=19813449031&OVKWID=152234564531
Obv you wll need a thingy to drive them.
UV exp boxes use actinic UV tubes - but I'm sure you all knew that already
(I didn't, I've just found out)
Or just buy a zillion UV LEDs and spend a few hours polishing the tops off.
westaust55
Moderator
Here is some more information on the subject:
Light/Exposure
The optimal wavelength for photoresist exposure is usually 350nm which is near UV (400nm is visible purple). The 'blacklight' lamps output maximum here. However, The Gxxx lamps emit far UV light, useful for erasing EPROMs bugs and your eyes, but have enough emission at 350nm to expose photoresist (not to mention that they are about 5 times more efficient than blacklight lamps and that photoresist is also sensitive down to to 253nm).
Look for fluorescent bulbs with markings that start with G = germicidal/bare glass, uv transparent (this is what you want for boards). Danger: these emit short-wave UV which can cause eye and skin damage. For example, H-G4T20BLB(3) is a UV light (G) with (4) watt capacity and (T20) means four pins, two at each end, 20mm apart from each other which is the standard.
The exposure of the photosensitive stock is the most difficult part of the process to predict. Differing sensitivities of photoresist and lights of different strengths will require experimenting with the exposure and development until a reliable result is obtained.
Test Exposure: Every setup will be different, do an exposure test with a scrap before trying with the real thing. Cover all but one end of the PCB with a shade and then move the shade back, exposing more and more of the PCB at regular intervals (e.g. 30 seconds to 2 minutes depending on how strong a light you think you have). When the last bit has been exposed for the interval you choose, stop and develop the scrap.
Examples: (your times will vary, do an exposure test first):
* 500W mercury vapor lamp (standard lightning lamp), getting around 18 minutes at a distance of 20cm. Or a mercury vapor yard lamp with the outer frosted glass envelope removed, leaving only the inner quartz bulb.
* 500W Gxxx lamp for 2.5 minutes at 18"
* A pair of 9W Tropical Aquarium "Blue" bulbs for 12 minutes at 6"
I used these...http://www.tlc-direct.co.uk/Products/FKT15UV.html...see post #53
works well
Incidentally, some years ago, I tried the 4w blacklight tubes that are commonly found in small handheld units for checking banknotes...no results even after 1 hour exposure time.
works well
Incidentally, some years ago, I tried the 4w blacklight tubes that are commonly found in small handheld units for checking banknotes...no results even after 1 hour exposure time.
Please see post #84.snip
Incidentally, some years ago, I tried the 4w blacklight tubes that are commonly found in small handheld units for checking banknotes...no results even after 1 hour exposure time.
(The lamp's about 2 years old.)
e
Hmmm, I was just trawling the Bay for UV lamps to see what I could find and I came across a "nail varnish gel lamp curing thing" (I don't have a clue either) but I did a specific search for them and there's a few all about £20. They claim to be "UV" but since people stick their hands in them, I doubt it.
http://cgi.ebay.co.uk/NAIL-TECH-36-W-UV-GEL-LAMP-LIGHT-DRYER-CURING-NAIL-TIPS_W0QQitemZ310143455206QQcmdZViewItemQQptZUK_Health_Beauty_Nails_Manicure_Pedicure_CA?hash=item310143455206&_trksid=p3286.c0.m14&_trkparms=66:2|65:2|39:1|240:1318|301:0|293:1|294:50
However, just looking at them, the look like they'd make great enclosures, just need a bit of something to cover up the front.
BeanieBots
Moderator
Oh come on David, be honest about it.
You were looking for manicure products when you happened apon it.
As you say, I doubt it's harmful enough to work.
Another thought, dentists use something similar to cure certain types of filling. Again, probably not pokey enough.
You were looking for manicure products when you happened apon it.
As you say, I doubt it's harmful enough to work.
Another thought, dentists use something similar to cure certain types of filling. Again, probably not pokey enough.
Yep you got me.
As an enclosure though, and perhaps the bulbs could be replaced with proper ones.
These are the ones they all seem to take, anyone know if it's a common size and therefore there will be proper UV tubes in that shape?
Edit: This seems to be all that dentists use, just a single LED. This is strange because after a trawl through digikey too, they have no LED's in the 350nm spectrum
So far, in all these 14 pages, I have seen no mention of the alternative way of "exposing" boards by laser printing (or even ink jet printing, according to a couple of references I have see on the net) the layout onto "Press n Peel" film, ironing this on to very clean, blank printed board, cleaning away the excess, and then etching.
I found an excellent step-by-step description located on an Australian web site a few weeks ago (alas, did not bookmark it), which looks like it might be worth investigating.
I found an excellent step-by-step description located on an Australian web site a few weeks ago (alas, did not bookmark it), which looks like it might be worth investigating.
Absolutely BCJ - he didn't ask, that's why you "have seen no mention"
I fear that a digression at this stage could put this prolonged thread into Nesbitexponential orbit.
Check Post 3 from Kevrus.
Insect killer tubes.
Tubes available for under a fiver,
Get a starter/ballast thing. Maybe a tenner?
Make a box. Another fiver.
Bit of glass for a quid.
Job done.
In 9 days and 130+ posts you could have made dozens of lovely PCBs
I'm working on modifying an inkjet printer to print directly to a pcb.So far, in all these 14 pages, I have seen no mention of the alternative way of "exposing" boards by laser printing (or even ink jet printing, according to a couple of references I have see on the net) the layout onto "Press n Peel" film, ironing this on to very clean, blank printed board, cleaning away the excess, and then etching.
I found an excellent step-by-step description located on an Australian web site a few weeks ago (alas, did not bookmark it), which looks like it might be worth investigating.
Looking around, it is very possible. The trouble is, there are only a few inks that are pigment based (ie waterproof). One of the most available, and cheapest (£10 a colour) is Epson's Durabrite.
what got me interested was this: http://techref.massmind.org/techref/pcb/etch/c84-st.htm
as that printer is no longer made, i thought I would start with an Epson S20.
I took it apart, and modified it to my needs. due to the design of the printer, I could only fit A5-width pcbs through it. Also, due to the paper sense mechanism, it was very difficult to trigger the printer to print, as opposed to have it reject the pcb straight of and declare there was no paper.
finally, after having it jam a few times, I managed to get a test print onto a piece of perspex I had kicking around (i dont have any pcb left). and it worked very well. Good line definition down to point 8 text.
Unfortunatley, i think i damaged the print head during the mods, as it started leaking quite a lot of ink. Now it doesnt recognise the cartridges.
So. i'm going to try and get my hands on a C84, and mod that instead!
Since the UV wavelength of 350nm to 400nm is very close to the visible light range, I would imagine most any strong light source will work. As mentioned, the real issue is finding the right exposure time. I use a 12 volt automotive headlight without any glass lens in front of it. No one mentioned muric acid or muriatic acid as a better chemical than ferric chloride for etching PCBs. It can be found in any hardware store as masonry cleaner or concrete etchant. I think its another word for hydrochloric acid. Mix equal amounts of muric acid and hydrogen peroxide. I noticed that the dry powder form of ferric chloride will begin turning into a liquid when exposed to the air and that it near permanently stains everything it touches. Very toxic to breath. Especially the powder.
Hardware store Muric acid is HCL deluted with water at 4 parts water to 1 part HCL. I would not recommend mixing pure HCL and H2O2 without first slowly deluting the HCL with water 4 to 1, then mix the H2O2. There are many dangers is the world. ACID and DANGEROUS must be one of those universal truths.
Right mostly everything has arrived today; I still await the UV stuff but I have:
A tray for developing and etching
Photoresist board
Clear fill to produce the mask
Developer solution
Ferric chloride beeds
The question is:
When I've used that £900 expensive spray etcher, it reused the same ferric chloride again and again until it wasn't strong enough and needed replacing, so how can I get more that one use out of my ferric chloride beeds?
I was thinking something along the lines of make the ferric chloride solution as per the label, then when used once, decant the ferric chloride off into a plastic container of some kind and re-use it in same way as the developer.
Also, what is the best way to dispose of ferric chloride? e.g. I've etched a board and need to clean it in water but I don't just want to wash the excess ferric chloride down the sink (same question regarding the developer).
And finally any safety thing I should be aware of other than; ventilation, protective gear.
Thanks,
David.
Andrew Cowan
Senior Member
When I've used that £900 expensive spray etcher, it reused the same ferric chloride again and again until it wasn't strong enough and needed replacing, so how can I get more that one use out of my ferric chloride beeds?
Yup - before I made an etch tank, I kept it in a jar, and poured it into the tray when needed.
Also, what is the best way to dispose of ferric chloride? e.g. I've etched a board and need to clean it in water but I don't just want to wash the excess ferric chloride down the sink (same question regarding the developer).
For rinsing boards, I wash it down the sink. There will be about 2ml of it clinging to the board, and you wash it with several litres of water. I've never considered that rinsing boards puts it into the sink.
To get rid of lots, eg a whole tankful, I neutrilise it with sodium hydroxide, and take it to my local 'hazodous waste plant' (dump).
And finally any safety thing I should be aware of other than; ventilation, protective gear.
It stains EVERYTHING (including skin). Don't dip sandwiches in it. Don't drink it.
A
If you make up a gallon you can use it over and over.
Is there a problem buying a container and funnel?
Why mention the price of the spray etcher?
Or, mix up just enough and dispose of it down Andrew's sink.
How can you decant a mixed-up solution?
If you have lumps at the bottom it means it hasn't been mixed properly (????)
Disposal/safety - there are numerous Product Safety sheets for Ferric.
e.g. Farnell website.
If you dilute it 100 to 1 it makes good mosskiller.
Try it on your neighbours lawn at midnight first.
Oxalic acid can be used to remove the worst of the stains - obviously not perfect, very toxic and not suitable for everything. Other than that, be careful.
Alternatively use Sodium Persulphate.
@ Andrew: good good that all sounds very familiar and do-able. I'll need to find a disposal place though. Also, I do have experience with the staining power of the stuff, quite funny after a while when people think you're bleeding heavily.
@Dippy: Nope, no problem with funnel or container.
The price seemed to be somewhat of a defining feature when I first mentioned it, so just for reference.
As to decanting it, I assumed that there would be lumps of iron that would come off during the reaction?
!!I think!! 2FeCl3 + 3Cu = 3CuCl2 + 2Fe !!I think!!
I'll have a look through farnell.
As for the moss killer, I suppose it's always good to know these things.
Edit: hold on wait, the should be a degree of water involved in that reaction. hmmm
H2O + FeCl3 + Cu = 3CuCl2 + Fe2O3 + H ???
No, but there is always that smell so there must be a gas. hmmm
Oh and the FeCl3 is in those beeds so that could change it...
Oh I don't know.
Last edited:
SilentScreamer
Senior Member
A interesting page on the actual chemistry behind it - http://www.artmondo.net/printworks/articles/ferric.htm
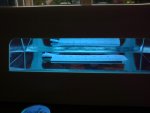
The lightbox nail thing arrived today (finally), it is perfect in shape for developing boards.
I've tried the UV light that came with it, in case it works. I did 3 - 30 minutes. I haven't had time to developed it yet and probably wont until the weekend so it there any way of telling if it has worked visually?
Thanks.
I've tried the UV light that came with it, in case it works. I did 3 - 30 minutes. I haven't had time to developed it yet and probably wont until the weekend so it there any way of telling if it has worked visually?
Thanks.
After i've exposed a board to UV, I can usually see the image in the board coating...sometimes need to tilt the board slightly to view but should be easily visible to the naked eye.
I would recommend developing ASAP after the UV exposure so as not to ruin the board by external light influences..good luck
I would recommend developing ASAP after the UV exposure so as not to ruin the board by external light influences..good luck
Andrew Cowan
Senior Member
On the boards I use I can see a pale yellow outline of the mask after exposure.
A
A
"..it there any way of telling if it has worked visually?"
- not with confidence, but I agree with Andrew's observations re: colour change.
This varies between board type too.
Basically, just get some developer and get on with it.
Your first tests should include varying exposure time and developer concentrate.
Many developers will happily work at <=20oC.
I use Seno with Fotoboard2.
As it is good quality it may not be avaialble from Ebay.
In a proper UV box exposure is 1'30" and developed in Seno in <30 seconds @ 20oC.
Then do a PCB strip to check for UV evenness - this is an absolute 'must do' for larger boards esp with <0.4mm tracks.
Obviously you will buy a Developer suitable for the board and not the cheapest unbranded stuff available?
Well I developed it on Thursday although I didn't see the usual stuff that I expect i.e. patches going very dark then when sloshed a bit the dark coming off like ink. Anyway, I kept going and once it was "done" and out the solution, it had definitely changed colour on one half.
I've just etched it and am staggared...
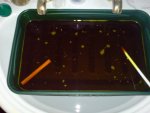
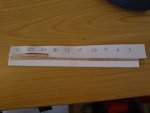
It didn't appear to do much and the whole process was rather cumbersome, to keep the tray at 40deg I had to boil a kettle, and fill the sink with hot water then sit the tray on top (actually worked very well and I'll use it again). Anyway, after about 8min of sitting in the ferric chloride half of the strip faded away. I've attached the results. Unfortunately it has faded the bits that were meant to stay as well. I suspect it got some excess light from the surrounding but it can have been much because I kept the tape mask on an left it upside down.
There also appears to be no difference between the 3 minuite exposure and the 30 minuite exposure. Thus, I am going to do another today all at once to try and get some more definite results but wanted to know something:
How do people cut their PCB? It took me ages to cut mine using a "dremel stylus" and a rotary blade, and I still had to snap it off. Have people bough special cutters or is it possible to use wire cutters etc.?
Thanks,
David.
I've just etched it and am staggared...
It didn't appear to do much and the whole process was rather cumbersome, to keep the tray at 40deg I had to boil a kettle, and fill the sink with hot water then sit the tray on top (actually worked very well and I'll use it again). Anyway, after about 8min of sitting in the ferric chloride half of the strip faded away. I've attached the results. Unfortunately it has faded the bits that were meant to stay as well. I suspect it got some excess light from the surrounding but it can have been much because I kept the tape mask on an left it upside down.
There also appears to be no difference between the 3 minuite exposure and the 30 minuite exposure. Thus, I am going to do another today all at once to try and get some more definite results but wanted to know something:
How do people cut their PCB? It took me ages to cut mine using a "dremel stylus" and a rotary blade, and I still had to snap it off. Have people bough special cutters or is it possible to use wire cutters etc.?
Thanks,
David.
Attachments
-
 816.9 KB Views: 20
 -
 815 KB Views: 22
Hacksaw, guillotine, milling machine - whatever your budget will stand.
Standard wire cutters would crack the board.
In production you can chain drill to make breakway boards - not pretty, edge looks like a postage stamp.
Sorry, there is no easy way for zero cost
Can't comment on etching though sadly.
Haven't got a clue what the left hand picture is meant to show(?).
(something sitting in etcher or Oxtail soup - can't see what it's meant to mean, sorry).
The other image... well, what did the negative look like.
In my UV box I expose for 1.5 mins.
If I exposed for more than 2 mins then ALL the photoresist would come off in the delevoper.
I develop for 30 seconds approx.
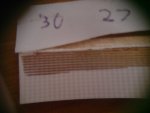
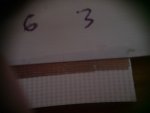
Here are some details.
Attachments
-
 833.5 KB Views: 16
 -
 857 KB Views: 12
Sorry my internet is appauling at the momnet.
The left image is the strip of PCB in the ferric chloride, in the tray, in the sink (with the hot water bellow).
I just cut of a strip of PCB. Covered it with tape, then peal of chunks on one side every 3 minuites.
The attachment shows the UV nail thing with the strip of PCB in with the left chunk pealed back.
Attachments
-
 880.1 KB Views: 20