Wanted: 08M PCB Circuit

Bozambo

Member
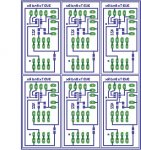
I have been trying for weeks to draw out a pcb circuit with little success. I tried Eagle PCB, Design Spark,Yenka to name a few. The problems have been either the respective libraries did not have one of the components I needed or the program was not to user friendly. One program would have taken weeks to complete the first tutorial.The requirements for my 08M CIRCUIT are as follows.
1. Two pulldown inputs at: 3 and 5.with two switches
2. Three outputs at : 0, 1 , 2. with three 4n35 /25 Opto- coupler.

Seeing that this circuit is very basic. I would appriciate if someone could could direct to any resourse where Ican soursce a copy for this circuit. A partial PCB FOR JUST THE 08M with two inputs and three outputw would be just as good. Better yet reference to a PCB PROGRAM with simulation would be appriciated.
 

JoeFromOzarks

Senior Member
I slapped this together in about five minutes with DipTrace. (The programming input with the BAT85 was already created.) :) It's quick and dirty.

I took the liberty of freeing up the SERIN (programming pin) and moved your C.5-input to C.4 since C.4 wasn't specified. I included a 3-pin header so you can select either the output or the SEROUT for programming.

:) joe
 

Attachments

srnet

Senior Member
One of the issues for most PCB design programs is that that they will not have all the libraries for all the components that you may want to use.

So its inevitable, in my opinion, that you need a PCB program where you find it easy to create you own components.

I wish you luck finding a program with all the component libraries you need, I just doubt you will find one.
 

Kecked

Member
If you want a program that has it all it don't exist. I use pcb artist which is a devivative of easy pcb by number one systems. I also get a discount from advanced because I am at a University. It is not that hard to make a package. Just remember thta a dip is a dip is a dip. Take the premade landing for the device and rename the pins and save. Not hard ata ll. I even had to draw a 100mm fader from scrath and that was not hard. Believe me when I tell you (beatles in my head now) I am a mechanical fool so if I can do it so can you. IF you can move a mouse and type you can do it. OR as I pointed out just use a generic board and solder it up. No one but you will ever know. In fact the analog meter clock I just did still has the actual breradboard inside the case. I did n't even bother making a board since the mini breadboard cost less than the board. Yes I'll make one eventually but I most likely will use a radioshack special for it since it really has one chip and a few wires going to the meters.

I use to be mr have to make a board. I spent a lot of cash and really got little for it. Consider breadboarding.
 

beb101

Senior Member
@Bozamb
Here is a basic 08m/08m2 single sided Eagle Cad brd file. It was laid out directly as a brd without a schematic using wire and generic parts. To modify it, just open it in free Eagle Cad 6.2. It has been live tested and works ok. Inputs at the top are non-inverted serial. These are inverted for the Picaxe with a 74LVC2G14 (DBV footprint). The square denotes pin 1. 22k is a 0805 discrete 22k Ohm resistor and next to it is a 0805 10K. The three pads on the upper right are for a SPDT on/off power switch. The two pads below this are for an LED with built-in resistor. The Picaxe is at the bottom together with two female headers for access to the pins. The small square is pin 1. The discrete is a 0805 0.1 uF ceramic decoupling capacitor.

When using Eagle, the Add Part button --> search box is your friend. For example, the TI DBV footprint is a SOT23-6 part and searching for either DBV or SOT23-6 will give you the standard footprint. In Eagle, dual in line sockets are in the ic-package library. Your 4N35 is a 6 pin socket. Just place it and refer to the datasheet pinout for routing. I only do single sided boards mostly because I can make them myself. The way I use Eagle is to add the parts, position them and start wiring; much like breadboarding. If you find yourself boxed-in and can't route a trace just add a couple of vias and jump the trace with a wire. Or alternatively, get a good nights sleep and look at your routing the next day. I find this solves most of my problems. For testing after making the board, I just use my meter to check continuity of traces to see that they are connected to where they should be.

Baxter
 

Attachments

inglewoodpete

Senior Member
In my opinion, CAD systems pay for themselves if you are making multiple copy of a circuit. However, CAD systems and custom-made printed circuit boards take too much time and a lot of resources and skill to produce one-off boards.

If developing a 1-off circuit for a PICAXE, I would go for a strip-board (vero board) or development (prototyping) board. These types of boards are available world wide: the links are to my local supplier here in Australia.
 

westaust55

Moderator
If you do consider DIPTRACE as mentioned by JoefromOzarks at post 2, then here in this forum are two alternative libraries prepared by mycroft and myself containing many chips and components frequently used by the PICAXE community. These libararies in general offer a more traditional layout of the IC pins/signals as if you were looking at the actual chip.

See posts 2 and 3 here:http://www.picaxeforum.co.uk/showthread.php?10576-DIPTRACE-PCB-Cad.

While I use DIPTRACE for the schematic drafting function, as my projects are one-offs they are always built on proto boards.
 
Top