PCBs

pscs

New Member
Sorry for the slightly off-topic post

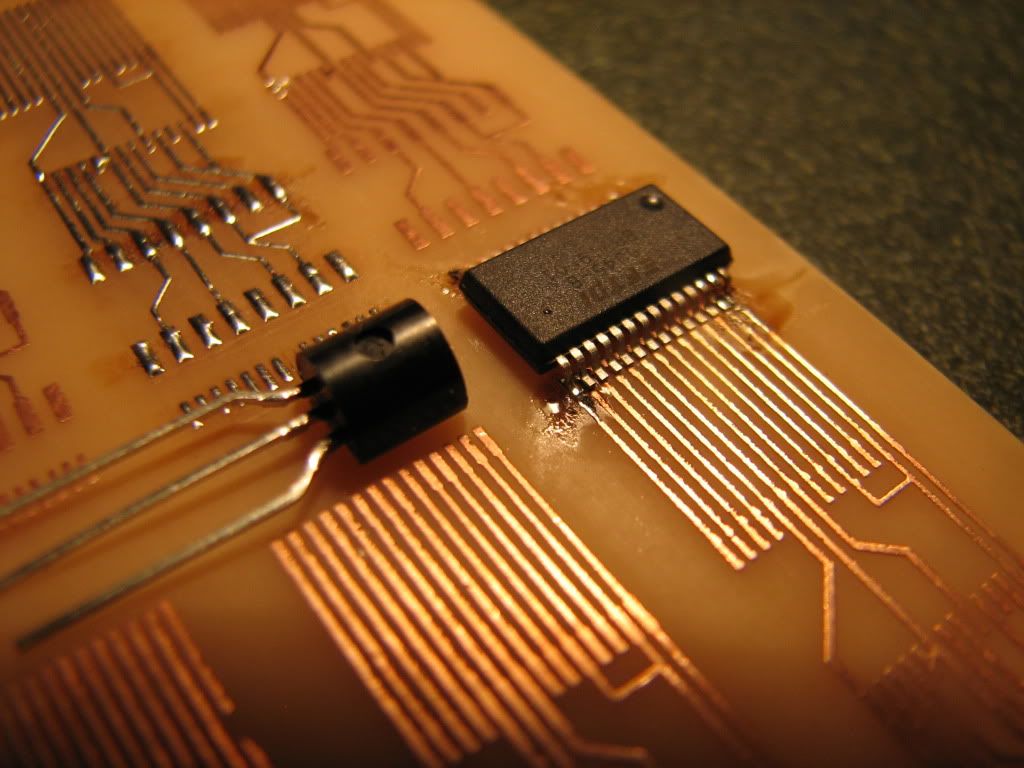
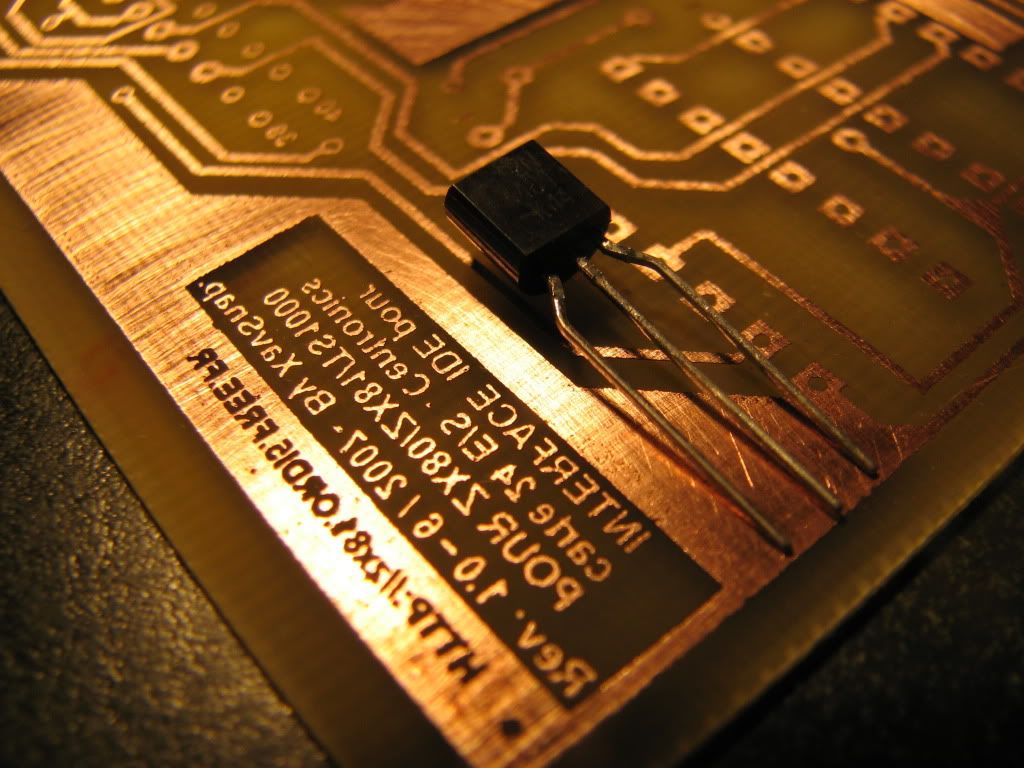
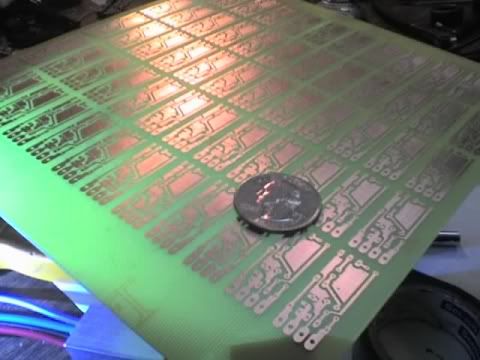
What do people do nowadays for making one-off PCBs?

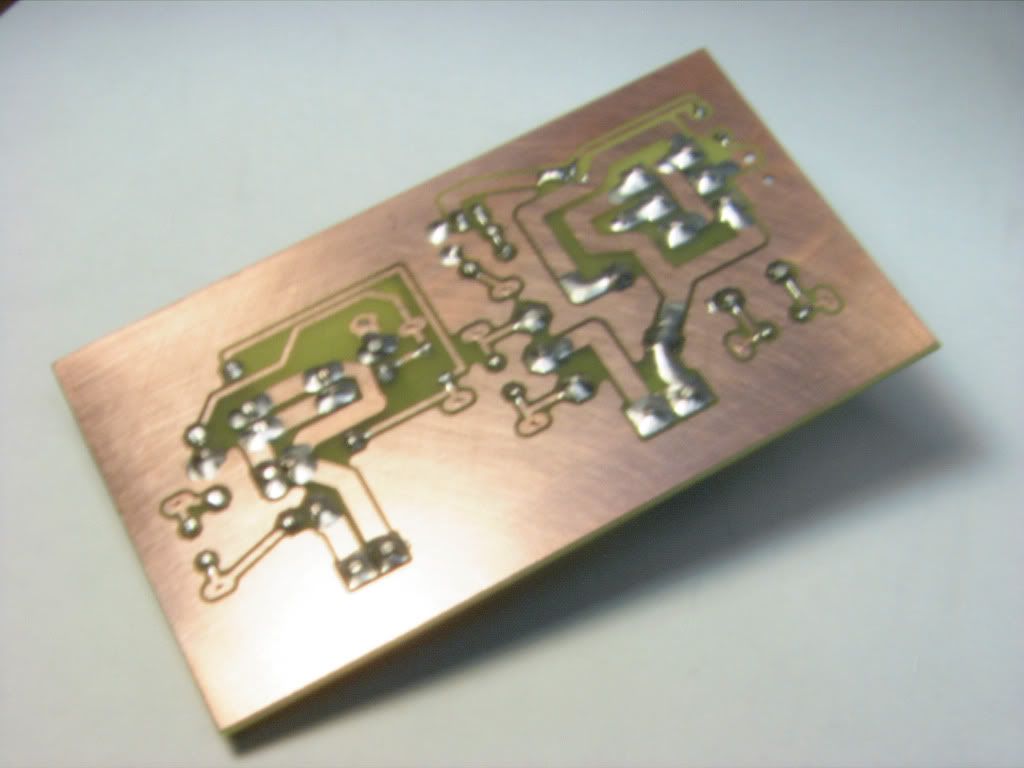
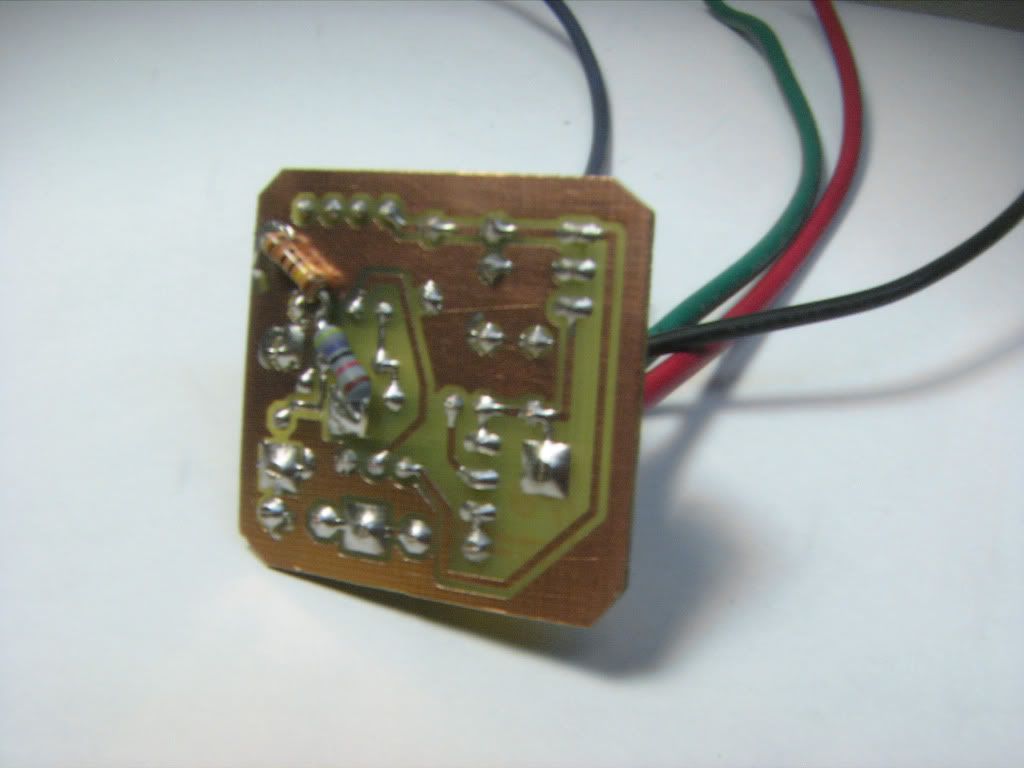
For my current PICAXE project I'm using stripboard, but it'd be nicer to have a proper PCB.

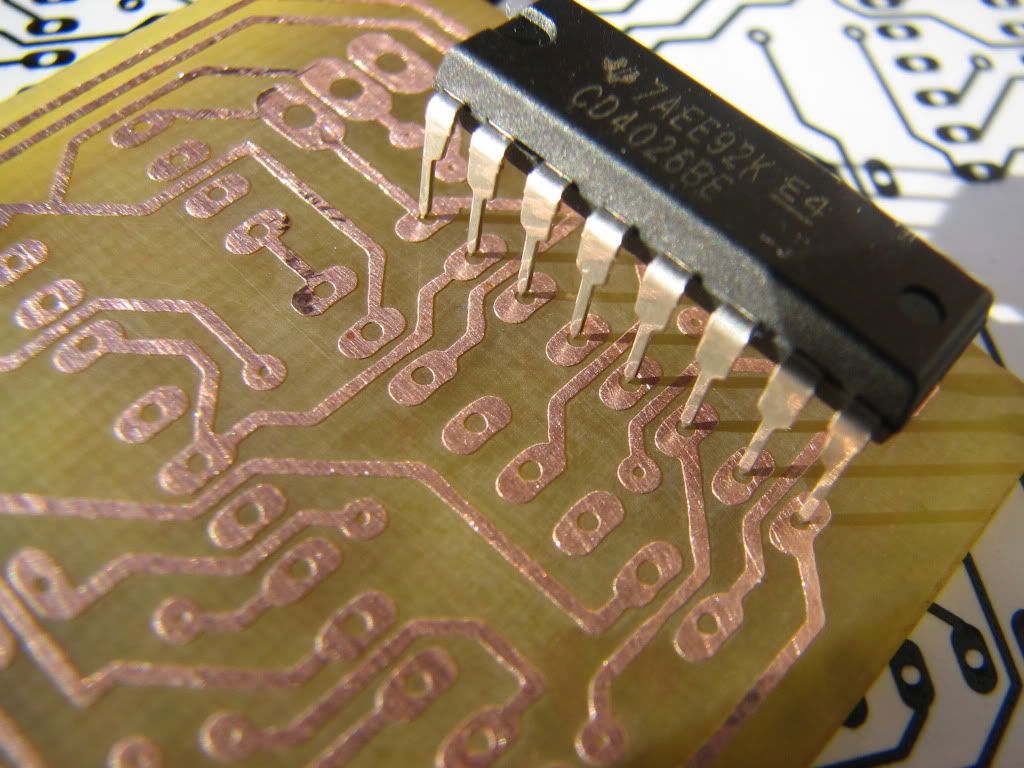
I haven't done any serious electronics for a while - about 20 years - and back then, one-off PCBs either needed a black pen and OHP acetates and UV light or self-adhesive black strips onto the bare copper. But, the world's moved on a bit since then... So, what are the current way of doing it that people find give the best results (for an affordable price).

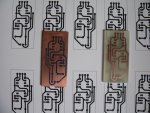
I've seen "Press-and-Peel" transfers, laser acetates designed for PCB and so on. Are any of those better or worse than others?

What about layout design? (Back in the day you had to do it all by hand) Are there cheap/free ways of doing that?
 

clockwork

Member
Very interesting SAborn. It is a pity that I didn't know this worked sooner as I purchased 100 UV LEDs off "Eb**" and have nearly completed a UV Box with 60 LED's.

A couple of months ago I purchased 70 odd brand new energy saving bulbs (11 watt - equivalent to 60 watts according to the box) for 1p each as the supermarket had been
taken over by the biggest Supermarket group in the world and everything had to go. I didn' know then that I had all the bits I needed, such is life.

Please let everybody know how you get on with this highly cost effective design, I was going to say "El Cheapo" design but did not want to hurt your feelings.


Clockwork.
 

Tricky Dicky

Senior Member
If you have a Laser printer you can try the toner transfer method. I have not tried it myself yet and understand it can be tricky when starting but once you have mastered the technique and use the right paper it can be quite successful. I have seen some PCBs produced by this method and the results have been as good as using photo-etch. Go to the Instructables website for more info.

Richard
 

pscs

New Member
If you have a Laser printer you can try the toner transfer method
I think this is the one I'm going to try for a start. It needs less other 'stuff' - no UV lamps or developer solutions etc, and I do have a laser printer. I found a 'starter kit' at Maplin which has transfer film, boards, etchant, trays etc, so I've got that on order. If it doesn't work, it still gives me equipment which I can use for photo etching as well.


(I suppose the next step after that is to start using SMDs instead of the "old" through-hole devices - less drilling and smaller boards - but one thing at a time - and I still have tons of 'old' ICs/resistors/etc from way back before surface mount happened)
 

RexLan

Senior Member
All you need is some photo gloss paper. Print you image at highest resolution and density and do the transfer with an iron on high for 3 minutes. Put in a pan of water with a drop of soap and help it release.

You don't need any trays. A small glass pan a little bigger than the pcb is just right.

(1 part) Muriatic acid and (2 parts) peroxide will do the etching.
 

pscs

New Member
Yes - but buying a glass pan would be more expensive than a couple of cheap plastic trays :) And I don't have any photo paper, so I may as well get the transfer film for a start. If that works, then I can experiment with cheaper options later.

And getting hydrochloric acid in small quantities isn't that easy either (in the UK) - ferric chloride is easier to get hold of without being chased by the police.... ;-)
 

Jeremy Harris

Senior Member
I use the toner transfer method a fair bit (example below) and it works well for one-offs. I use the cheapest glossy photo paper I can find (usually Staples own brand thin stuff), set the laser printer for coated paper, all black, fine resolution, iron the paper on to a cleaned, Scotchbrite rubbed and degreased (with IPA) bit of board (using the highest setting of the iron and allowing plenty of time for the heat to soak through and melt the toner) and then soak the paper off for 15 minutes of so in warm water with just a tiny bit of detergent added. The paper usually peels off cleanly leaving the toner stuck tight to the board, but there's often a bit of fluffy stuff that needs rubbing off with your finger (whilst the board is still wet). It can then be etched and drilled as required, drilling being the hardest part, as accuracy is needed and the carbide drills that are best for drilling GRP board are easily broken (I have a high speed small bench drill that makes this job simpler, but it's still tedious for a big board). I etch with ferric chloride, as it's cheap and easy to buy, but it works better with a dash of hydrochloric acid added and it has the downside of being messy.

PCBs - small.JPG
 

pscs

New Member
Thanks for the info. The stuff I've bought will be arriving tomorrow (given what the pack includes, it's not that bad value anyway even without the transfer film) but if I do more I'll take a look at the glossy paper method.

I etch with ferric chloride, as it's cheap and easy to buy, but it works better with a dash of hydrochloric acid added
Where do you get the HCl from?

I've always used ferric chloride because it's easy-ish to buy, but it is messy, and takes a while.

(Just been looking around for HCl and it seems I'm not the only one finding it difficult... (eg http://www.diybanter.com/uk-diy/155444-hydrochloric-acid-where-can-i-get-some.html ). People suggest 'brick acid', but it looks like even that's not possible now - B&Q's 'Brick acid' has been "improved", and now contains "no hydrochloric acid"... The online chemical store people suggested a few years ago has been closed down. Drain unblockers use sodium hydroxide, etc. Someone did suggest eating some dodgy food and saving the results - but I don't think I'm that desperate yet... Ugh)
 

pscs

New Member
What free layout software do people use?

I've seen a lot of people suggest EagleCAD, but that's not free (any more?). I've got ExpressSCH/ExpressPCB, but that seems to be aimed at getting people to use their PCB service. I'm just having a look at DesignSpark PCB.

Any others I should see?
 

SAborn

Senior Member
Clockwork,

I dont intend to used the energy saving bulbs (compact fluros) as i have a scanner system built using UV leds that work very well for me.
The globe test was just to see if it worked as someone had quoted they do, and i often get asked "how can i make a PCB easy and cheap" so i tested the theory more so for the benefit of others. (thats why its just a rough setup)
I was surprised it works as well as it did.
As you say with a watchful eye you can pick these globes up very cheap, mine was $2.00 for a pack of 4. and i had the rest of the junk to do the test with.

With a cheap UV light source, the rest is cheap as the precoated board in not expensive and as for developer i just use Caustic Soda (often sold as drain cleaner) mixed at 5 grams per litre of water, i dont think making a hobby PCB can get much simpler.

One advantage with photo resist that not many people realize, is you can leave the resist layer on the board to protect the copper and just solder through the resist without a problem.

There is some who like the toner transfer method, i have used it but dont like it, and would think using it for SMD would be problem proned.
 

SAborn

Senior Member
ExpressSCH/ExpressPCB, but that seems to be aimed at getting people to use their PCB service.
I dont see how you have come to that conclusion as i use it all the time for home boards and its the simplest artwork package around.

It prints out perfect and even allows you to make a DXF code for drilling with a cnc machine if you have one.

The only problem i find is the pads on the footprints are too fine with large holes, but simple answer is to make a few custom footprints for the common components like resistors, diodes, IC's, caps, etc.
 

Jeremy Harris

Senior Member
Where do you get the HCl from?
My local hardware store used to sell it in plastic bottles for cleaning drains etc, but since they've closed down I now get it from ebay - cheap and simple! I'm amazed at the chemicals you can buy via ebay, and even more amazed that they send them through the post OK!
 

SAborn

Senior Member
drilling being the hardest part, as accuracy is needed and the carbide drills that are best for drilling GRP board are easily broken (I have a high speed small bench drill that makes this job simpler, but it's still tedious for a big board)
Jeremy,

A tip for you that works very well, try mounting a ultra bright white led directly under the drill table so it shines upwards towards the drill bit, you will find the little holes will glow through the fiber glass board and makes lining the drill bit up to the holes in the copper pads 10 time easier, something so simple makes the job much easier.
 

smeagol

Member
Glossy magazine paper works very well for the toner transfer method, I just rip pages out of any old magazine. It doesn't matter very much what's already printed on it, but the more white the better as it helps to see what you have printed. Make sure you use a dry iron as steam messes up the transfer.
 

Hydroid

Senior Member
Where do you get the HCl from?
Here (Ontario, Canada) you can buy it at any pool store - It's called 'Muriatic Acid' - which as another name for Hydrochloric Acid (HCL). Sells for about $8 Cdn / 4 litre jug.

As someone else has mentioned previously, you can also use it as etchant by mixing 1 part Muriatic acid with two parts of Hydrogen Peroxide (available here in any drugstore). It works quite well and much less nasty (in my opinion) than Ferric Chloride.

Regards, John.
 

Jeremy Harris

Senior Member
Jeremy,

A tip for you that works very well, try mounting a ultra bright white led directly under the drill table so it shines upwards towards the drill bit, you will find the little holes will glow through the fiber glass board and makes lining the drill bit up to the holes in the copper pads 10 time easier, something so simple makes the job much easier.

Thanks very much for that, it sounds a great idea. I have a light mounted alongside the chuck, pointing down and sideways, but your idea makes much more sense. I'll drill a hole in the bed of my drill and give it a try.
 

MartinM57

Moderator
What free layout software do people use?

I've seen a lot of people suggest EagleCAD, but that's not free (any more?). I've got ExpressSCH/ExpressPCB, but that seems to be aimed at getting people to use their PCB service. I'm just having a look at DesignSpark PCB.

Any others I should see?
Diptrace (www.diptrace.com) has quite a few followers on this forum - there is PICAXE (and other useful) component library at post 3 in http://www.picaxeforum.co.uk/showthread.php?10576-DIPTRACE-PCB-Cad.

There's also a big thread about it at http://www.picaxeforum.co.uk/showthread.php?12111-Free-DIPTRACE-Upgrade!&highlight=diptrace+library started by Mycroft (RIP)
 

SAborn

Senior Member
Many comment on how nasty Ferric Chloride is, and that HCL is better......... Well what do you think the base acid in Ferric Chloride is??? its HCL. the only nasty part with feric chloride other than it being HCL is the stains it leaves.

If you put some steel in old used ferric chloride, all the copper and ferrious particles will settle to the bottom and you will be left with clearish HCL on top.
 

Hydroid

Senior Member
My dislike of Ferric Chloride, over Muriatic acid + Hydrogen Peroxide, is ALL to do with staining. I didn't express that well.

On that note, most chemicals have undesirable, and potentially dangerous, side effects if not used carefully. Good ventilation, gloves, an apron and most definitely safety glasses or a face shield is a MUST. It would be a lifetime of regret should you loose your eyesight trying to make a PCB ! The same precautions are also highly recommended while soldering the completed PCB.
 

MFB

Senior Member
I suppose it depends on how much you value your time and heath but I would recommend using a low cost prototype supplier like http://www.expresspcb.com. Easy to use and free schematic and layout (auto checking) software, with good prices for their 'standard' size double-sided boards. No need to worry about drilling all those holes either.
 

Dippy

Moderator
I having deja voo ;)
I'm a Ranger/Proteus/OrCad person , laser print, develop and sodium persulphate in a bubble etcher.
All from Mega UK coincidentally.
We have a milling thing at work which is quite effective.

But for decent prototypes I'd go along with MFB's sentiments, although (in UK) I use PCBPanel as they are 15 miles from me and I can get PCB turnround in 3 days.
Obv the advantage with total DIY is a 2 hour turnround :)
 

Grogster

Senior Member
I have never had ANY luck with the toner-transfer method, but it was most likely something I was doing wrong, as others seem to have made it work. I was using standard 80gsm printer paper, and I note that other members here mention using glossy paper, so that probably makes all the difference in the world.

I also dislike that you have to barbque the PCB to get the toner onto it, which thermally stresses the copper and the board, but I suppose, for one-off prototypes...

I still prefer Kinsten pre-sensitized boards and UV exposure - even for one off's or prototypes, but you do have to have the UV chamber, and many do not. Although normal fluro tubes will work over time as mentioned, and if you are lucky enough to be able keep the big bright thing in the sky around for more then a few hours, it emmits tons of UV, so sunlight-exposure also works well - if you can keep the sun out long enough!!! :D

I prefer and use Ammonium Persulphate solution, the used solution of which crystallizes out to Copper Sulphate.
This is just MY preferred method and etchant - I have never tried the HCL and Hydrogen Peroxide method, but I guess it works or others would not be talking about it. I have a couple of spare car batteries lying around, although this is H2SO4(Sulphuric Acid), and it most likely will eat the bench and tray away with the board... :D

I use Sprint Layout for my PCB work, but it is not free, and I know other members here are no a fan of it for reasons best left to them to explain - each to their own.
 

bluejets

Senior Member
I use ferric chloride, available easily from Farnell as "beads" (and no dangerous chemical fees for transport) just add water.

As for the toner transfer, I use blue "Press n Peel" and a HP laser printer to print.

It takes a bit to master and I use normal domestic iron set to just under the hottest setting, with a sheet of A4 type paper between the iron and the press n peel. Seems to absorb any "rubbish" off the soleplate.

I must have spent $100 over the years buying what people say is "fantastic" and "works great" on photo paper only to find it does not work. Theirs may well do, but it appears different countries may use slightly different paper for the same product and so the delima.

One word about Toner here that I found out the hard way, Brother brand printers do NOT use refusable toner so it will not work as toner transfer method. After my old HP died, I replaced it with a Brother and had more strife than Flash Gordon and did not know where I was going wrong. Just happened to read some info from Ultrakeet and went out and bought a new HP. All ok now.

http://ultrakeet.com.au/ ........for info on PC boards, toner etc.


http://au.element14.com/cif/ar371/granules-ferric-chloride-2l/dp/1783550?Ntt=1783550 .....for ferric chloride

If you find all this a bit messy to do then there is always Futurlec where they do "one-off" boards.
 

SAborn

Senior Member
Another tip for those who like the toner transfer method, the best paper to use is the shiny backing from printer labels (the part you throw in the bin) if you print onto the shiny side the labels were stuck to, after ironing the toner onto the board, place the board in the fridge/freezer for a while to cool down and the paper will just peel away dry leaving a perfect clean transfer behind.

You will find many companys use sticky labels and with asking you can get heaps of waste label backing paper free, your local sign maker will have rolls of it from the backing of vinal lettering thats used on everything now days, or just buy a cheap pack of printer labels, then you can cut the backing sheet up to suit the circuit size and use a couple of the labels to stick the small backing piece to a standard A4 sheet of paper to feed through the printer.

If using recycled backing paper (free stuff), first test with a hot iron to ensure its safe to use with a laser printer and that the paper dont have a plastic coating that will melt with heat.

This stuff works so well you will never use your old glossy paper or magazines with a wet removal again.......give it a go.
 

John West

Senior Member
What free layout software do people use?

I've seen a lot of people suggest EagleCAD, but that's not free (any more?). I've got ExpressSCH/ExpressPCB, but that seems to be aimed at getting people to use their PCB service. I'm just having a look at DesignSpark PCB.

Any others I should see?
I like FreePCB, because it is truly free. No limits on any aspects of the program (not crippled in order to sell you the "professional" version.) Just a good, easy to understand PCB design pgm that generates readable files and will import various schematic design program files, and will output Gerber fabrication files.
 

Grogster

Senior Member
One word about Toner here that I found out the hard way, Brother brand printers do NOT use refusable toner so it will not work as toner transfer method. After my old HP died, I replaced it with a Brother and had more strife than Flash Gordon and did not know where I was going wrong. Just happened to read some info from Ultrakeet and went out and bought a new HP. All ok now.
A-HA!!!! - That would have been my problem then.
My Laser printers have all been Brother ones, so I guess that is why I never had any luck.
 

Grogster

Senior Member
@ SAborn - Re: Toner Transfer - you should send in an article to Silicon Chip magazine if it works like you say - many readers would like to hear about and use that method - even I am interested to give it a try, but I will have to find another laser printer, as although I have two here and one at the workshop, they are ALL Brother ones! :p (see above post)
 

MikeGyver

Senior Member
I've used the toner transfer method for years with excellent results. I was determined to learn how to do it and spent about a week straight teaching myself. I make essentially flawless transfers every time now. If anyone would like details on my process just ask.


SAborn

Senior Member
@ SAborn - Re: Toner Transfer - you should send in an article to Silicon Chip magazine if it works like you say - many readers would like to hear about and use that method
I have spoken to SC over several methods of PCB making for the hobby user, but Leo Simpson thinks it has been covered well enough and is not interested in this sort of information.

Also i and others have had design ideas stolen by SC, as they are very interested in information until you disclose the full details and then they dont want to talk to you, only to find SC will do their own article on the design sometime later and put it into production via kit form.
I personally know of 1 person who has sued them over this and has won the case, but they now have a clause to any rights of information give to them.

As for the method of using label backings to print on, i have also used this to print text on (just need to flip the text before you print) and iron text labels to the top side of the board before assembly, things like "Power In", V+ & V-, 5V, Etc, although to do a full silkscreen print on the top side can look a little messy and hard to align.
 

inglewoodpete

Senior Member
Reverse Fonts for Toner Transfer

I use the toner transfer method for all of my low volume boards. I noticed that the text on the board depicted above was reversed.

I have found some reverse fonts that I use for when I "do the ironing" as my wife calls it.

Look for PRANSR.TTF sometimes found in prmirror.zip. An alternative is KCAB.TTF (Strait Kcab) but it can be a bit chunky.

!sdrawkcab epyt ot nrael ot si neht evah uoy melborp ylno ehT (The only problem you have then is to learn to type backwards!)
 

MikeGyver

Senior Member
Just mirror the text in MS paint or photoshop. If you use Eagle (or any other layout program) you just put the text on the correct layer and you don't have to rig anything.

The text in the 2nd image I posted is normal, as you can see. This is because it is part of the bottom copper layer in eagle and was automatically mirrored (as you can see int he first image). The text in the 2nd to last image is backwards because this board was simply a test image I found online.
 
Top